Showing posts with label Freezer Friendly. Show all posts

Tuesday, 5 May 2015

Sandwich Corn Bread

Prep Time : 15min
Cook Time : 3 hours 15 min
Yield : 1 loaf
Freezer- friendly : Yes


Ingredients:
80ml water
350g bread flour
40g sugar
Pinch of salt
4g instant dried yeast
150g frozen corns kernel
50g unsalted butter

1) Blend corn with 2tbsp water.
2) Add blended corn and all ingredients into breadpan in the order listed above.
3) Select Basic Bread Function "Donlim BM Function No.1", crust intensity "light" and weight 700g.
4) Let cool completely on wire rack before slicing.

Original Recipe:
I love tasty healthy treats by Alan Kok

Monday, 13 April 2015

Okara

Prep Time : -
Cook Time : 40 min
Yield : 1 cup+ Okara
Freezer-friendly : Yes 


Ingredients:
Leftover soy bean pulp from the following recipe
http://quickymama.blogspot.com/2015/04/homemade-soy-milk.html

Steps:
Steam leftover soy bean pulp for 40 min, let cool and freeze!

Monday, 23 February 2015

Avocado Banana Ice Cream

Preparation Time : 20 minutes
Freeze Time : 6 hours
Yield: About 7 scoops of ice creams
Freezer Friendly : Yes


Ingredients:
2 ripe bananas
1/2 avocado
1/3 cup coconut milk
2 tsp grapeseed oil

Steps:

1) Cut the banana flesh and avocado flesh into chunks.
2) Put all ingredients into blender, blend until smooth.
3) Put in freezer. Remove every 1 hour, stir for at least 6 hours.

Original recipe:
http://www.homemade-baby-food-recipes.com/ice-cream-for-baby.html

Saturday, 13 December 2014

Dorayaki

Prep Time : 25 min (pancake) + 8 hours 15 min (filling)
Cook Time: 30 minutes (pancake) + 3 hours (filling)
Yield : 8 dorayaki
Freezer Friendly : Yes


Ingredients:
1cup all purpose flour
1tsp baking powder
4 eggs
1/4cup brown sugar
2tbsp honey
1-2tbsp water
2tbsp oil
red bean paste

Steps:
1) Beat egg with sugar and honey until ribbon stage.
2) Sift flour and baking powder, fold into egg, chill for 15 minutes.
3) Stir 1/2tbsp water.
4) On a non-stick wok at medium low heat, dip paper towel in oil and grease the wok lightly.
5) Using a ladle, drop the batter 15cm above the pan, when bubbles is seen on the surface, flip it over.
6) Put red bean paste in middle of 2 pancake. Wrap with cling wrap individually and freeze.

Red Bean Paste Ingredients:-
200g red bean
Water as needed
100g brown sugar (Original calls for 200g)
Pinch of salt

Red Bean Paste Steps:

1) Soak the red bean overnight or at least 8 hours.
2) Rinse and drain the red bean.
3) Put red bean and water and bring to boil in a pot. Water should be 1-2 inches above the red bean.
4) Turn off the heat after boiling, cover with lid for 5 minutes.
5) Drain the red bean.
6) Put red bean and water and bring to boil in a pot. Water should be just enough to cover the beans. (I read on the internet that the water level is important to ensure that the bean does not split)
7) Turn heat to medium low after boiling, simmer for 1 hour plus (I did it in 1 1/2 hour) until the bean can be mashed easily with your finger. Keep adding water to cover the beans as water will evaporate.
8) Turn heat to high and add sugar in 3 portions. Stir continuously until you can draw a line on the bottom of the pot using the ladle and you can see the surface of the pot for more than 2 seconds.
9) Add salt and turn off heat.
10) Put the red beans on a flat wide tray, mash with fork/potato masher and let it cool.
11) If you plan to use it soon, cover with cling wrap and fridge. You can also divide into small portion (150g-200g for this bun recipe) and freeze it for future use.

Original recipes:
http://www.justonecookbook.com/recipes/dorayaki-japanese-red-bean-pancake/

Friday, 5 December 2014

Anchovies Stock

Preparation Time : 2 minutes
Cooking Time : 25 minutes
Yield: 1500ml anchovies stock
Freezer Friendly : Yes

Ingredients:
80g anchovies
1500ml water
2 tsp rice bran oil

Steps:
1) Heat 2 tsp rice bran oil in non-stick pan and stir fry anchovies until fragant.
2) Add water, turn heat to high and bring the stock to boil.
3) Turn heat to low and simmer for 20 minutes.
4) Let cool and keep in ice-cube tray/breast milk storage bag to freeze.

Thursday, 27 November 2014

Raisin Bun with Red Bean Filling

Preparation Time : 15 min (bun) + 8 hours 15 min (filling)


Cooking Time: 2 hours (bun) + 3 hours (filling)
Yield : 7 mini buns (Diameter about 3 inches)
Freezer Friendly : Yes

[Tips : Prepare the filling in big batch on weekends and freeze it or simply replace the filling with cream cheese, peanut butter and so on]


Bun Ingredients:

2tbsp grapeseed oil
1 egg
150ml fresh milk
3tbsp brown sugar
1/4tsp salt
350g bread flour
2tsp instant dry yeast
5tbsp raisins
Bun Steps:
1) Knead using breadmaker for 10 minutes (Function 6 for Donlin Breadmaker).
2) Set the dough aside for 50 minutes
3) Flatten the dough and divide the dough into 7 portions.
4) Roll in round, flatten it (looks like mini pizza dough), put about 1 tbsp filling in centre, wrap it up by pulling edges to join from upper, lower, left and right side of the flat dough, Use finger to slightly twist the meeting point of the 4 sides to close the gap/hole.
5) Bake it under 170 degree for 20 minutes.

Filling Ingredients:-
200g red bean
Water as needed
100g brown sugar (Original calls for 200g)
Pinch of salt

Filling Steps:

1) Soak the red bean overnight or at least 8 hours.
2) Rinse and drain the red bean.
3) Put red bean and water and bring to boil in a pot. Water should be 1-2 inches above the red bean.
4) Turn off the heat after boiling, cover with lid for 5 minutes.
5) Drain the red bean.
6) Put red bean and water and bring to boil in a pot. Water should be just enough to cover the beans. (I read on the internet that the water level is important to ensure that the bean does not split)
7) Turn heat to medium low after boiling, simmer for 1 hour plus (I did it in 1 1/2 hour) until the bean can be mashed easily with your finger. Keep adding water to cover the beans as water will evaporate.
8) Turn heat to high and add sugar in 3 portions. Stir continuously until you can draw a line on the bottom of the pot using the ladle and you can see the surface of the pot for more than 2 seconds.
9) Add salt and turn off heat.
10) Put the red beans on a flat wide tray, mash with fork/potato masher and let it cool.
11) If you plan to use it soon, cover with cling wrap and fridge. You can also divide into small portion (150g-200g for this bun recipe) and freeze it for future use.


Original recipes:
http://17chipmunks.wordpress.com/2014/09/25/spiral-cream-cheese-peanut-butter-bun/
http://www.justonecookbook.com/how-to/how-to-make-anko-red-bean-paste/

Donlim breadmaker manual Recipe3

Sunday, 2 November 2014

Vegetable Stock

Preparation Time : 15 minutes
Cooking Time : 1 hour 35 minutes
Yield : About 1 ltr stock
Freezer Friendly : Yes


Ingredients:
2 medium carrots
2 stalks of Choy Sum
3 stalks of leeks
4 stalks of celery
1 big onion
1++ litre water
2 tbsp grapeseed oil

Steps:
1) Wash all ingredients and cut into pieces.
2) Heat oil in a pot. Add all vegetables and stir fry until fragrant for about 2 minutes.
3) Add water and boil.
4) Once boil, turn heat to low and simmer for 1 hour 30 minutes.
5) Add water as needed if water evaporates fast.
6) Let cool and store in breastmilk bag in freezer.


Chicken Stock

Preparation Time : 15 minutes
Cooking Time : 4 hours 15minutes
Yield : About 1 ltr stock
Freezer Friendly : Yes


Ingredients:
1 medium carrots
1 stalk of Choy Sum
1 stalk of leeks
1 stalk of celery
1 big onion
1++ litre water
3 chicken carsass

Steps:
1) Wash all ingredients and cut into pieces.
2) Put all ingredients into rice cooker, select boiling function.
3) Once boil, cancel boiling function, select soup function with 4 hours timer.
4) Sieve oil on surface using a oil siever.
5) Let cool and store in breastmilk bag in freezer.

Original Recipe:
http://www.jamieoliver.com/recipes/chicken-recipes/easy-chicken-stock/

Wednesday, 22 October 2014

Zucchini Bread

Preparation time: 20 minutes
Cooking Time : 45 minutes
Yield : 4-5 adult servings
Freezer Friendly : Yes


There is no zucchini can be found in where I live, in a small town. My friend brought some zucchini for her kids from another town and she is kind enough to give away 2 zucchini for my girl! I was excited about it that I immediately pureed and freeze worrying that it will go bad the next day. I search for zucchini recipe and i decided to make zucchini bread for my girl.

Ingredients :
3 eggs
1 cup grapeseed oil
1 cup brown sugar
3 cups all purpose flour
1 tsp salt
1 tsp baking powder
1 tsp baking soda
3 tsp ground cinnamon
2 cups zucchini puree

Steps:
1) Preheat oven at 165 degree celcius.
2) Ready 2 baking pan (8 inches x 4 inches) with parchment paper. 
3) Put egg, oil and sugar in a mixing bowl. Beat with electrical mixer.
4) Add salt, sifted flour, baking powder, baking soda, cinammon into the mixture. Beat well.
5) Add zucchini puree and mix well.
6) Pour batter into baking pan.
7) Bake for 45 minutes or until the fork comes out clean when put into middle of the cake.
8) Cool on wire rack before removing the cake.

Original Recipe:

Tuesday, 21 October 2014

Fluffy Raw Wheat Germ Pancake

Preparation Time : 10 minutes
Cooking Time : 30 minutes
Yield : 16 mini pancakes (6cm diameter)
Freezer Friendly : Yes


Pancake has been my favorite breakfast prepared for my girl because of the simple ingredients, shorter cooking time compared to bread-making and I can always add new ingredients to it for a healthier version. I always opt for this when I am out of time like today because I overslept.

If you want the pancake to look round, ensure the batter is smooth and not too thick that when you drop the batter onto the wok that it could not form a natural circle. Add a little water to the batter to thin it. It will take several tries before you got the right consistency. 

If other ingredients like raw wheat germ is used, it will make the batter a bit rough to deal with, so you might opt to leave it/ opt to add in powdered form ingredients such as brown rice powder for smoother consistency.

The original recipe calls for 70g castor sugar and 10g butter. I prefer less sweet version, so I reduce the sugar to 35g and use brown sugar. Oil can replace butter as I ran out of time to measure and melt the butter.

Ingredients:
3 eggs
35g brown sugar
1 tsp honey
1/2 tsp baking powder
120g all purpose flour
2 tbsp raw wheat germ (Optional)
50g fresh milk
10g grapeseed oil

Steps:
1) Crack egg, add sugar and honey. Beat with electrical mixer for 3 minutes.
2) Fold in sifted baking powder and flour using spatula.
3) Turn non-stick wokto low heat.
3) Add raw wheat germ, milk and oil into mixture, use folding motion to mix well.
4) Use a big spoon (about 3 tbsp)drop batter onto centre of wok slowly from distance of 2 inches, let the batter spread into circle naturally.
5) When bubbles are seen ( about 40 seconds), flip the pancake to the other side. You will see the pancake rise (Do not flip/touch the pancake at this point). After 40 seconds, flip the pancake to see if it's cook, it should have the same colour as the other side.


Tuesday, 7 October 2014

Soft Butter White Bread

Preparation Time : 15 minutes
Cooking Time : 3 hours 19 min
Yield : 10-12 slices of bread
Freezer Friendly : Yes


Ingredients:
1 cup low fat milk
1/2 tbsp honey
1 tsp brown sugar
1/2 tsp Himalaya salt
1 egg
300g bread flour
50g cake flour
3/4 tsp instant dry yeast
3 tbsp chopped butter

Steps:
1) Remove breadpan from breadmaker.
2) Put in all the above ingredients except butter (in sequence listed above).
3) Insert and lock breadpan into breadmaker.
4) Select Mode No.1 (basic bread), select weight 900g, select crust intensity light, press start. (I use Donlim Breadmaker)
5) When all ingredients are combined, around 2 minutes, add in chopped butter bit by bit. 

Tips : Remove bread from breadmaker immediately when the bread is ready to avoid the bread shrinking.

Original Recipe:
Donlim Breadmaker Recipe Book

Monday, 6 October 2014

Soft Pumpkin Bread

Preparation Time : 35 minutes
Cooking Time : 3 hours 19 minutes
Yield : 10-12 slices of bread
Freezer Friendly : Yes


Starter Dough Ingredients:
100g bread flour
70g boiling water

Starter Dough Steps:
1) Pour boiling water onto bread flour, mix with fork. 
2) Refrigerate for 20mins or overnight (more than 8 hours).

Bread Ingredients:
Starter dough
40g grapeseed oil
100g pumpkin puree
50g water
2 tbsp formula milk (or normal milk powder)
2 tbsp brown sugar
Pinch of salt
200g bread flour
50g all purpose flour
1.5 tsp active dry yeast

Bread Steps:
1) Remove breadpan from breadmaker.
2) Put in all the above ingredients except starter dough (in sequence listed above).
3) Insert and lock breadpan into breadmaker.
4) Select Mode No.1 (basic bread), select weight 700g, select crust intensity light, press start. (I use Donlim Breadmaker)
5) When all ingredients are combined, around 2 minutes, add in starter dough bit by bit. 
6) Bread should be done in 3hours and 19 minutes.

Tips : Remove bread from breadmaker immediately when the bread is ready to avoid the bread shrinking.

Serve with your favorite jam or toppings, otherwise, throw into freezer ziplock bread for the coming busy week on-the-go breakfast! To serve, just steam for 15 minutes ( I throw into the steamer straight from the freezer the moment I wake up so that when I am ready to go, so is the bread) and it tastes as soft as freshly made!

Original recipe : Donlim Breadmaker Recipe Book

Sunday, 5 October 2014

Fluffy Egg-free Pancake

Preparation Time : 10 minutes
Cooking Time : 20 minutes
Yield : 15 mini pancakes
Freezer Friendly : Yes


Ingredients:
1 cup all purpose flour
1 cup fresh milk
1 tbsp brown sugar
1/4 tsp salt
1 tbsp grapeseed oil
1 tbsp baking powder
Butter & honey for topping (optional)

Steps: 
1) Put flour, sugar, salt and baking powder in a bowl and mix using hand whisk.
2) Gradually add milk, follow by oil into the mixture. Stir till combine using hand whisk.
3) Heat a non-stick pan, turn to medium low heat.
4) Using a small ladle (about 4 tbsp) batter pour the batter in middle of the pan about 3-4 inch from the pan, let the batter spread into even circle.
5) When bubbles are seen, flip on the other side. If batter run out of the way, use a clean spoon to perfect the edge.
6) Serve with butter and honey or freeze for on-the-go breakfast!


Original Recipe:
http://www.rakskitchen.net/2012/08/eggless-pancakes-recipe-pancake-recipe-soft-fluffy.html?m=1

Monday, 29 September 2014

Mini Red Bean Paste Bun


Preparation Time : 15 min (bun) + 8 hours 15 min (filling)
Cooking Time: 2 hours (bun) + 3 hours (filling)
Yield : 7 mini buns (Diameter about 3 inches)
Freezer Friendly : Yes

[Tips : Prepare the filling in big batch on weekends and freeze it or simply replace the filling with cream cheese, peanut butter and so on]


I just feel like I do not have enough time each morning, so I have twisted the original recipe of spiral bun to normal bun, and instead of cream cheese peanut butter, I have some leftover red bean paste which I made few weeks ago which I want to clear off. By the way Japanese called red bean Adzuki Bean, not sure if it's exactly the same but I have seen Adzuki Bean in pack ( I have yet to try) which looks bigger in size compared to the normal red bean.

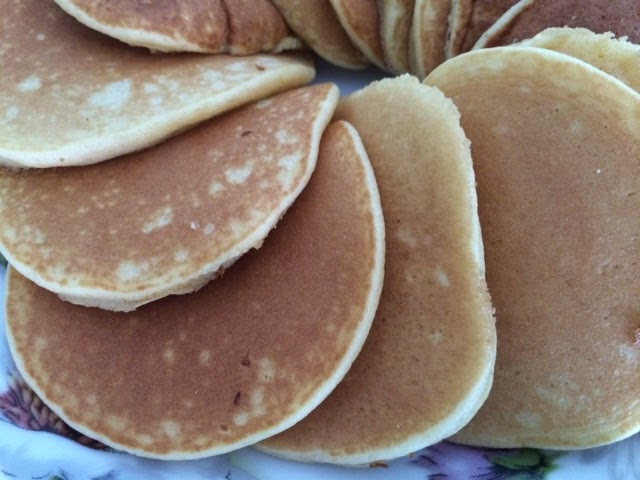
The result of this bun, it tastes fine but the red bean paste tastes dry, perhaps due to the paste was kept in my freezer for sometime (I think more than a month), it tasted good when it was freshly made. I left it overnight, the bun did not turn hard the next day, my girl only had half a bun, she had never tried red bean paste before. The filling recipe I adopted from a Japanese (refer to link below, she provided detail illustration on how to prepare the Anko/red bean paste) so I think that this is the correct and proper way of preparing red bean paste. The steps is lengthy and time consuming for me so I think the next round I will try an easy version which is just boil the red bean, add sugar, and blend it.


Bun Ingredients:
100g bread flour
30g cake flour
1 tsp instant yeast
1 tsp condensed milk (Susu Cap Junjung)
1 tsp brown sugar
80ml Dutch Lady fresh milk
1 tsp grapeseed oil (Original called for melted unsalted butter but I was running out of butter)


Bun Steps:
1) Knead using breadmaker for 10 minutes (Function 6 for Donlin Breadmaker).
2) Set the dough aside for 50 minutes
3) Flatten the dough and divide the dough into 7 portions.
4) Roll in round, flatten it (looks like mini pizza dough), put about 1 tbsp filling in centre, wrap it up by pulling from upper, lower, left and right side of the flat dough, Use finger to slightly twist the meeting point of the 4 sides to close the gap/hole.
5) Bake it under 170 degree for 20 minutes.

Filling Ingredients:-
200g red bean
Water as needed
100g brown sugar (Original calls for 200g)
Pinch of salt

Filling Steps:

1) Soak the red bean overnight or at least 8 hours.
2) Rinse and drain the red bean.
3) Put red bean and water and bring to boil in a pot. Water should be 1-2 inches above the red bean.
4) Turn off the heat after boiling, cover with lid for 5 minutes.
5) Drain the red bean.
6) Put red bean and water and bring to boil in a pot. Water should be just enough to cover the beans. (I read on the internet that the water level is important to ensure that the bean does not split)
7) Turn heat to medium low after boiling, simmer for 1 hour plus (I did it in 1 1/2 hour) until the bean can be mashed easily with your finger. Keep adding water to cover the beans as water will evaporate.
8) Turn heat to high and add sugar in 3 portions. Stir continuously until you can draw a line on the bottom of the pot using the ladle and you can see the surface of the pot for more than 2 seconds.
9) Add salt and turn off heat.
10) Put the red beans on a flat wide tray, mash with fork/potato masher and let it cool.
11) If you plan to use it soon, cover with cling wrap and fridge. You can also divide into small portion (150g-200g for this bun recipe) and freeze it for future use.


Original recipes:
http://17chipmunks.wordpress.com/2014/09/25/spiral-cream-cheese-peanut-butter-bun/
http://www.justonecookbook.com/how-to/how-to-make-anko-red-bean-paste/